Atlas presents 3 simple steps for running an ad:
- Create the Advertiser
- Upload the Creative
- Create the Campaign
The first 2 steps need only to be done once if your advertiser renews his campaign. If a new creative is to be used, then only the second 2 steps need to be executed.
Here is a step-by-step for the last component to this process:
- Beneath the Campaign heading click Create.
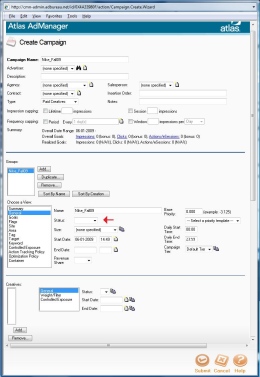
- Name your Campaign by using the Atlas naming convention:
Advertiser_Semester
ex. Nike_Fall09
- Select your Advertiser from the drop down.
- Continue to the midway point of your screen. See image for reference.
- Set Status to Active.
- Select ad size.
- Enter the start and end date of the campaign in the appropriate fields.
- On the left hand side of your screen, select Goals under the Choose a View heading.
- Enter your impression count in the Impressions field beneath Goals.
- Select Flags beneath the Goals heading.
- Select End when count reached and End when end date reached.
- Select Site under the Choose a View and add your site from Available to Selected.
- In the lower left hand corner click Add.
- Select the appropriate creative and click Submit.
- In the lower right hand corner, click Submit.
This process will setup the basic ad spot on your site. To take advantage of more advanced features available with Atlas such as targeting ads to specific pages, contact us through support.collegepublisher.com.

